This idea came from Сніжана Король, who successfully dyed eggs with green dye made of red tulips. Don’t be surprised, it’s quite common for fresh red flowers to dye eggs green. I must say, the tulip dye dyes surprisingly well and surprisingly fast, smells a bit like raw potato, and we’ll have to wait and see about the light-fastness.
Now, the recipe. I didn’t have red tulips, so I bough some in the store (was looking for as dark a red as possible), and enjoyed them till they wilted.
Took the flowers, chopped them with scissors, did not soak them (though you could try, it’s generally recommended), covered with 500ml of hot water and cooked in a pot for about 20 min. at more or less boiling temperature. Let them cool, strained the petals and threw them out, added alum and the dye was ready. The dye gave much even tone on an egg wiped with vinegar before dyeing, so I would recommend that.
The book I have on dyeing fibres with plant dyes suggested that adding alum with vinegar, or, optionally iron, would produce different colors. As you might already know, it doesn’t always work the same for eggs. After playing a bit with the basic alum recipe, I split the dye into two cups, and added a gulp of vinegar into one, and iron mordant into the other. Not recommended, both of these.
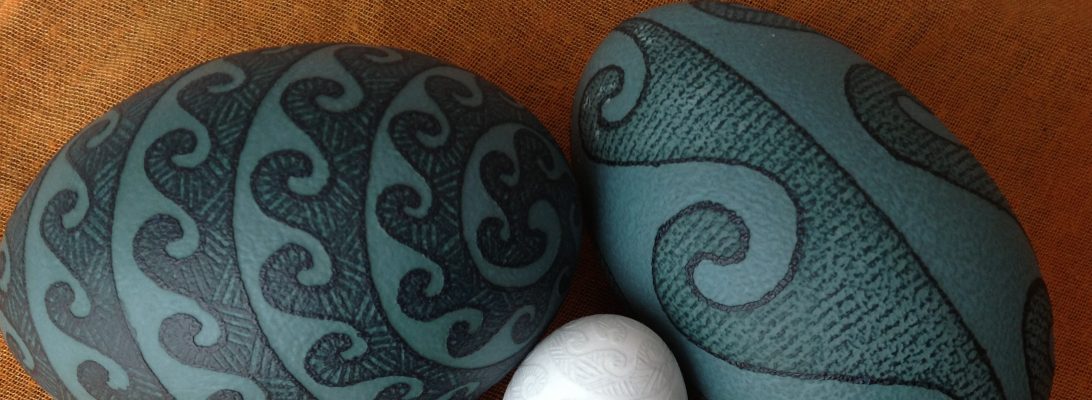
Below, clockwise, from top (12) to bottom left (9):
- untreated chicken egg in a dye with alum, 10 or 15 min.
- dye with alum, chicken egg wiped with vinegar before the first coat of dyeing, first shade 10 min, next shade 1 hour, next shade about 12 hours. Beautiful (never mind my shaky hands, I’ve been doing so much of drop-pull, that the regular kistka is refusing to make even curves).
- brown chicken egg, dye with alum – not as even as white egg.
- goose egg pre-dyed yellow with old coreopsis – ok, but not as vibrant as white chicken.
- chicken egg, dye with alum and vinegar – became all spotty and coming off easily. Perhaps too much vinegar? Anyway, not recommended, no need to spoil a perfectly dyeing dye.
- chicken egg, dye with alum and iron

I have no more functional tulip dye left, so my tulip experiment is over for now, but there are still plenty of tulips around Toronto, so now it’s your turn. And yes, my book says that yellow tulips can give a yellow dye, and can also be supplemented with daffodils and narcissi. It says there to use the mordants for yellow that I don’t use (tin or chrome), but you could try just alum, and see what happens, anyway it is different on eggs than it is on fibres.
 Something you can easily find in the middle of the city. Chestnut on the left, oak on the right. The chestnut is the variety with yellowish-green blossoms. Perhaps the one with white or pink (haven’t seen the pink ones here) would give a different shade? The oak is a young tree, also just bloomed recently (if those are considered blooms), according to my dad the variety is the Northern red oak (Quercus rubra or Quercus borealis). The lighter shade is after less than an hour in a dye, the darker one – overnight. No issue with chestnut whatsoever, the darker shade of oak was powdery and was coming off, but it’s possible that would be rectified with repeated dyeing rather that the whole night straight, or also overdyeing with another dye for final color.
 These are iron, vinegar and alum. Soda didn’t really work much at all, so it’s not in this picture. Then I added alum into both vinegar and soda jars, to see whether that would improve how the color took. Left the one in just alum and vinegar+alum for another hour to achieve one more shade, left the rest for the night. Here is before taking the wax off, iron, vinegar, alum, soda (that one didn’t change at all after adding alum, and did not give a darker shade overnight, vinegar improved with alum, but the dye didn’t adhere so well to the egg):


