And the last post in today’s posting spree. Three eggs from Kulzhynskyy II-5,8,15 (egg ## 44, 56, 82), Kursk area and governorate, Sloboda Kozatska. These eggs are beautiful and I love them, I have written some before (not these three, it was the first time for these, and I think they might turn out better second time around). These eggs were written in 1891 by a peasant woman Pelageya Aleksandrovna Natarova, who was originally from the village Tazov of Kursk area.
The story of Kursk area eggs is quite unusual, because we generally believe that Russians did not write eggs, however Kulzhynskyy says that the population of all there areas in and around Kursk is predominantly “velikorusskoye“, that is, Russian. He mentions about the eggs acquired in the town of Kursk at the market (so not the ones I have here) that they are written mainly by the old-believer women presumably from the villages and are unknown to the town women. He never says directly that these were written by Russian women, and I don’t know whether old-believers were all necessarily ethnically Russian. What he does say (and that is also quite obvious from the images themselves), that the Kursk area eggs are very detailed, fine, and unlike any other area eggs.
So yea, a bit of a mystery and some potential controversy.
Yellow – elderflower with alum, red – brazilwood with alum, black – logwood with iron.
Here is how brazilwood red (at least this batch) looks like without the yellow underneath, directly on white. This egg was dyed red at the same time with the first brazilwood egg, but it was sitting in the carton waiting for me to decide what exactly I was going to do from Kulzhynskyy with the first color being red (that is rather unusual and drastic, since almost always the first color, the color of the main lines, is white). The black is logwood with iron. Technically it should be possible to get the black from brazilwood with iron (one of the previous eggs was done that way), but by the time I was finishing this one, my iron/brazilwood bath was not cooperating sufficiently well.
I tell you, trying to replicate the 19th century catalogue eggs with natural dyes is a whole different story than just writing eggs as you please and dyeing them with natural dyes. Especially this new/current project of mine, where most of the time (except during the warm-up) I am trying to limit myself to the dye sources that Kulzhynsky mentions in the text of the catalogue. It is a challenge! 🙂 Though I am not complaining.
This is Kulzhynskyy XXVII-16 (egg # 1897), village Bujaki, Bielsk area, Grodno (Hrodna) governorate, currently the village seems to be in Poland close to Belarus border, in year 1895 when this egg was acquired the population was mixed Polish-Belarus.
This is the second of the brazilwood eggs I completed, and I quite like it. The first dye here is yellow (rather than white, which is quite unusual) it’s applewood chips with alum, then red is brazilwood with alum, then black is logwood with iron, and then vinegar etch to white. Kulzhynsky IX-4 (586), rozheva (“of rosette, or rosette-like”), village Chudnovtsi, Lubny area, Poltava governorate, 1894. At that time it would have probably been etched with kvas (fermented sour liquid made of vegetables or grains), I etched this one with household vinegar.
brazilwood red over applewood yellowlogwood blackvinegar etch to whiteafter wax removalimage in the cataloguedescription, egg #586
This was supposed to be green, but turned out brown. I probably would need to play with the ph of logwood to take the red shade out, and maybe then it would be more green. Not sure I have the bandwidth for that right now, the classes deadlines are a little wild, so logwood is not a priority.
The egg is based on Kulzhynskyy 5-15, the green “rose” (there’s some debate about which particular flower the Ukrainian word рожа refers to, but in our context it’s not so important), the village Hubske, Lubny area, Poltava governorate, year 1888. Maybe at some point I’ll make it again with proper green, not brown.
I’m starting this journal of my experience and relationship with my craft of egging – this is how in the egging community we colloquially call our Egg Batik or traditional (sometimes semi-traditional) craft of wax resist on eggs, in Ukrainian tradition it is called pysanky (when referring to the objects – the decorated eggs) or pysankarstvo (when referring to the tradition).
Within the context of the MA in Folkloristics and Applied Heritage studies which I started in September at the university of Tartu, what I am doing here in this journal is called auto-ethnography. But I don’t quite know yet what that means other than the obvious – observing and recording my own experiences in the ethnographic manner with the methods of social anthropology, or something like that.
I have a method I will follow though, and I am bringing it from my previous life as a philosopher, more specifically, as a phenomenologist. The method is called body hermeneutics, and it has been created by my philosophy teacher, Sam Mallin, based on the philosophies (both as theory or conceptual framework and as practice) of Merleau-Ponty, Heidegger, and Nietzsche. I am listing them in a counter-chronological way, because it would be probably fair to say that Merleau-Ponty’s philosophy has contributed most to the method itself, and Nietzsche’s the least, if one were to assess it by “content”. However, this order of listing them also reveals the lineage, because Merleau-Ponty was studying Heidegger and being influenced by till the last year of his (Merleau-Ponty’s) life, and Heidegger, or course, has been studying Nietzsche, even though at some point around WWII he seems to distance himself from Nietzsche and Nietzsche’s metaphysics.
<This into is becoming too long, am I avoiding the plunge?> Sam used these type of brackets in his own notes to indicate hyper-reflections, especially of this somewhat critical type.
Briefly about the method – I have to say this, because this will not be a solely private text, it will become public. The method in based on the description of a situation that has a hold on us (in this case my situation is the practice of egging, the doing of the craft of egg batik, but it can be any situation, as long as it captures us sufficiently for us to stay in it). The description is done by feeling out and describing our experience through the four “regions” (Merleau-Ponty) of our phenomenological body (perceptual, motor-practical, social-affective, and cognitive). We describe both how the situation (including things and phenomena participating in the situation) is/feels/appears to us (through our bodily regions), as well as how the situation influences and adjusts the functioning/style/attitude of our capacities themselves. This all sounds very theoretical, but to give an example, we describe both how something looks to us, as well as how what we are looking at influences our vision. Still abstract, but it will have to do in the intro, and hopefully some examples will follow eventually. We circle through the descriptions repeatedly, and eventually we get somewhere, we learn something about the situation, though often not immediately, not in the first few sessions. It is a cumulative sort of process.
Sam suggested three major steps to go through each time we do the work.
1) sketch out questions – what are the things we are wondering about as we are starting today’s phenomenological journey. The questions can be of different kinds – from specific questions about this specific “project”, to more general questions, and even more general questions, to specific questions that might seem unrelated to the project, but still are somehow in our side view.
Sometimes it’s not a bad idea to have a bit of a break or change of place between step 1 and step 2.
2) do a round of observation or “silent descriptions” of how the situation works – feel out the situation without writing anything down.
3) write out the descriptions systematically, follow up of the insights that might have presented themselves in step 2, work through all 4 regions if possible. When stuck or even when not stuck, a good strategy is to explore a region that seems least relevant or least engaged in the situation, though if that doesn’t work, then start from anything that works.
If one has a lot of time to do the work, one will keep switching between steps 2 and 3, as one writes something out and then needs to take time to feel out without writing, or sometime to re-attune oneself to the situation. Sometimes one will take breaks, and usually one will not go back to step 1 even after a break, unless one feels that would be useful.
My process of writing eggs is such that I cannot write on the eggs and write notes simultaneously, but I do have periods when the egg is in the dye and I have to wait for it, so maybe that will work just fine.
So enough of avoidance, here I go.
(3:45 pm) Questions
Start with the most difficult and the ultimate for me: What is my relationship with the eggs, and with the egging, with the research of the tradition, and the “experiments” I will need to do? Who am I in this: the researcher, the crafts person, the egger, the dyer, the scientist (???), the anthropologist or the ethnologist, the philosopher/phenomenologist (permanently so?)? Or maybe a Ukrainian, a human, a woman? Or something else? How do these different options and roles change my attitude, or my treatment, my involvement with the eggs/egging? And then the other side of the relationship: what is this egging and these eggs? (I am already refusing to use any of the typical categories – craft, folk art, artefact, even the generic “thing” and opting for an everyday colloquial word that doesn’t even exist in that same way in Ukrainian – what does this tendency or preference of mine mean, how does it affect my relationship, and what affects this tendency in my existing relationship?)
Ukrainian identity, language, history, tradition, current war – how do all these influence my relationship with egging and eggs, and through which bodily regions? Social affective to some degree, cognitive also? How do I feel about this thing being Ukrainian? What are the mixed feelings, what are the seeming contradictions? In what ways do I want to claim the Ukrainianness, and in what ways do I want to avoid it or bracket it?
The motor region – the rhythm and pace, and the manifestation of that through the sound of egging – the stylus on the egg, the dunking in the dye, all that. How do those reflect my initial mood/emotional attitude, how do they change as I work on it (work? Is that what I will be doing and what does that mean, which meanings of “work”)?
The usual anxieties and/or excitements about a new project. What are they, how do they manifest themselves, how are they the reflection of my more general values, needs, desires, passions?
I think that’s more than enough to start. I’m itching to do it, so here I go.
(4:03pm)
I am not including my notes in this post, the notes need to mature, both as they are written, and also some distance needs to be developed between the written note an me, some time needs to pass to let the notes become the notes, solidify in time, something like that. I might even post the whole notes of this first day or parts of them later, but it is too early to do it now. Or so I feel today.
But I will include the photos of the egg, most of which (except the final background color) was completed on that first day.
This is an egg from Vira Man’ko’s The Ukrainian Folk Pysanka, table 4-17, Lviv region. For some unknown reason I often start my season with this egg, it’s a warm-up egg for me. Yellow is coreopsis with alum, red is sappan wood with alum, the black initially was not working, so I etched it back to white and did a few dips into logwood with alum. Technically, it’s dark purple, but looks almost black. There stylus was new, the egg shell did not cooperate very well, so there are several issues visible on the egg, but for a warm-up it’s OK.
After a long pause, I’m restarting experiments with natural dyes on eggs. Gratitude for a push to start now instead of waiting longer goes to two different initiatives, the first one being “Pysanky for Ukraine” – an amazing group of egg artists have been getting together every year on April 1st to write some pysanky. These are the eggs I have managed to start while being online with other 100+ eggers. The second occasion for restarting the eggs is the fundraiser Natural Dyers & Printers for Ukraine in which I have been invited to do a Q&A on egg batik. Since I will be answering questions, and will probably need to record a bit of a demo in advance, I might as well get my hands dirty :). Jokes aside, I am extremely grateful and humbled by the wonderful people and the amount of their love of the art(s), knowledge, experience, hard work, and the resulting expertise.
In these eggs, the left drop-pull is dyed with cochineal extract with alum, the right one with logwood extract with alum, and in the middle non-drop-pool egg, the first yellow layer is coreopsis extract with alum, then a quick vinegar etch back to white, then cochineal with alum for those light purple/lilac spots and the final background is the same cochineal with a dip into iron water.
I thought it would be interesting to use camomile on a traditional egg pattern with sort of inverted camomile on it.
Yellow – dried camomile with alum (herbal tea bag), black – logwood with iron. The yellow did not adhere very well to the egg shell, but it might just be something wrong with the egg itself, it worked ok on other eggs.
The pattern in from Vira Manko’s book, from Yaroslav, Nadsyannya.
I have tried logwood essence in the past and was not overly happy with it – it only gave black, was prone to “caking” (I think that’s what it can be called, when the dye accumulates on the surface of the egg but comes off easily whith the wax), sort of found a solution – placing the back egg into another dye (I think I used red Sappan wood), to seal the black of logwood more to the surface of the egg, and didn’t make it again even though I do still have some of the essence powder.
Then, me being the restless experimenter, I saw the logwood chips being sold in one of the online shops, and could not resist buying them and trying them out.
According to Cardon, logwood (Lat. Haematoxylum campechianum) was the Mayan black dye, the word for logwood tree and for the color black are the same in Mayan language. It was brought to Europe along with the other South- and Central American dyes, and at the beginning caused some confusion – the lilacs, blues and purples achieved with logwood were extremely desirable but not lightfast, so at some point there was even an attempt to outlaw the logwood dye. When the Europeans finally got over their fashion desires and started using logwood for the black, the ration of quality per price of it ended up being much better than other sources of black, including the later non-natural version. It kept being used long after the invention of the chemical dyes, the last shipment of logwood logs came to England around the beginning of the second world war, and the last of that was milled sometime in the 1960-s. Logwood essence was already in use for a while and was more economical to bring over. It is still used now in medical pathology, haematoxylin which is made from logwood is a common stain used in histology.
So, here are some of my first logwood chip result. I have soaked them in boiling water with some calcium, and the first batch of dye was this soaked water, the second one was the same chips simmered in new water again, giving a very similar if not the same result. The dye I got was a bit brown-looking, and was giving a sort of cream to meauve to purplish brown. With strong yellow it produced the mustardy-green, and with alum – dark almost black purple. Some of the instructions said, if it looks brown, then the acidity of it can be reduced to result in a more bluish color, so I did add some baking soda since I did not have the suggested ammonia, and indeed the changed the outcome towards greyish-blue with alum and black with iron. Similar results on turkey eggs.
I’ll try to get some ammonia and play more with it.
The 3-day pysanky retreat in Toronto is now over, it’s been a wonderful experience, amazing people, new friendships, exquisite art, ingenious craft, and the atmosphere full of inspiration, which, I’m sure, will last for a while. If you have an interest in decorating eggs, whether traditional, or contemporary, you have to come next year! (Possibly in June). Whether you are new at this, or you have been doing it for years, you will learn a lot.
Now, this is the only egg I managed to do, I just enjoyed too much seeing what others are doing, chatting, learning…
I was asked to do a presentation on natural dyes, and that in itself was a wonderful experience for me. I felt welcomed and very much encouraged, there is a lot of interest and desire to use natural dyes on eggs. I also made brought a set of 6 dyes, and even though natural dyes require much more time than chemical ones, they are very unpredictable, and some of them did not want to cooperate, several people tried them. By next time I think I will figure out a more cooperating set of dyes, and that will probably make a difference.
Gold – coreopsis extract, brown – combination of dried sappan wood dye and logwood extract dye. Chicken egg.
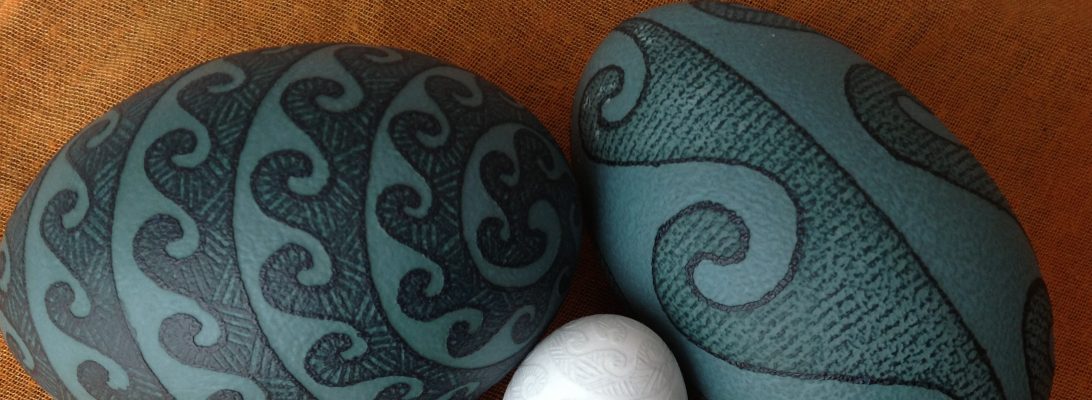
I love these kinds of patterns from the North-East of Ukrainian ethnic territories, this area is now in Russia, and this is where one of my great-grandfathers was killed during World War II. These are so earthy and so sky-ey at the same time. I sometimes think, if birds were to make pysanky (the decorated eggs), this of what they would look like. Maybe it’s the abundance of pine-branch motif, that look so much like feathers. They also remind me the patters of native Americans.
The dyes: yellow is probably buckthorn (though maybe still weld? When you make and throw out 3 yellow dyes in 10 days, things become a bit confusing). The red is sappan wood. Then things became somewhat complicated. I was going for dark brown and put it into walnut, but it actually managed to eat out the darker red and gave me quite light brick-brown.
I didn’t mind the color, but for this egg preferred it to be traditional rather than experimental, so the egg waited for about a week till I made logwood. This time, as also previously, logwood on other eggs was coming off with wax, so I made an experiment. After logwood was dark enough, I let the egg dry, and next day put it back into sappan wood hoping the the coat of another dye will keep the logwood from pealing off (that seemed to have worked OK with the dark purple egg in the previous post). Voila! Seems to have worked just fine. Now let’s hope the logwood dye doesn’t spoil before I want to use it again – I have to make new yellow, and possibly also new red, and I used up all of the logwood extract I had left from my first purchase of natural dyes few years ago.
Here’s another take, where you can see the side-band also.